Train Models
- 07 Apr 2025
- 5 Minutes to read
- Print
- DarkLight
- PDF
Train Models
- Updated on 07 Apr 2025
- 5 Minutes to read
- Print
- DarkLight
- PDF
Article summary
Did you find this summary helpful?
Thank you for your feedback!
This article applies to these versions of LandingLens:
| LandingLens | LandingLens on Snowflake |
| ✓ | ✓ (see exceptions below) |
LandingLens offers two methods for training models:
- Fast Training: This is the default option. LandingLens will automatically fine-tune its settings to optimize model training speed.
- Custom Training: Also called "Advanced Training". This is an advanced option recommended for users who are familiar with machine learning. Custom Training allows these users to have more granular control over pre-processing transforms and manual hyperparameter tuning. For more information, go to Custom Training.
Note:
Custom Training is not supported for Anomaly Detection.
Models Do Not Train on Unlabeled Images
If there are unlabeled images in your dataset, those images will not be used in the model training process. However, LandingLens will display predictions on those images after the model has completed its training. It's important to note that these predictions will not contribute to performance metrics, as metric calculations rely on comparisons with the ground truth.
Images Are Resized During Model Training
When you train your model, LandingLens resizes all images to make training faster and more effective. This resize does not affect the original images. This means that the original high-resolution images are always available in the Build tab.
When you use Fast Training (the default Train option), all images are auto-resized according to your project type:
| Project Type | Dimensions for Model Training (in pixels) |
|---|---|
| Object Detection | Rescaled with padding to 640x640 |
| Segmentation | Resized to 800x800 |
| Classification | Resized to 512x512 |
| Anomaly Detection | Resized to 480x480 |
| Visual Prompting | Resized to 512x512 |
Note:
If you have large images that include small objects to detect, these objects can be lost due to the automatic resize. You can use Custom Training to choose the resize width and height manually. Or, you can resize images before you upload them to LandingLens.
Train Models
The easiest way to train a model in LandingLens is to use the Fast Training method (simply called "Train" in the user interface). During Fast Training, LandingLens automatically fine-tune its settings to optimize model training speed.
To train a model using Fast Training:
- Open the project that has the images you want to train on.
- Click Train. (If you want to train a model based on a specific snapshot instead, go to Dataset Snapshots.
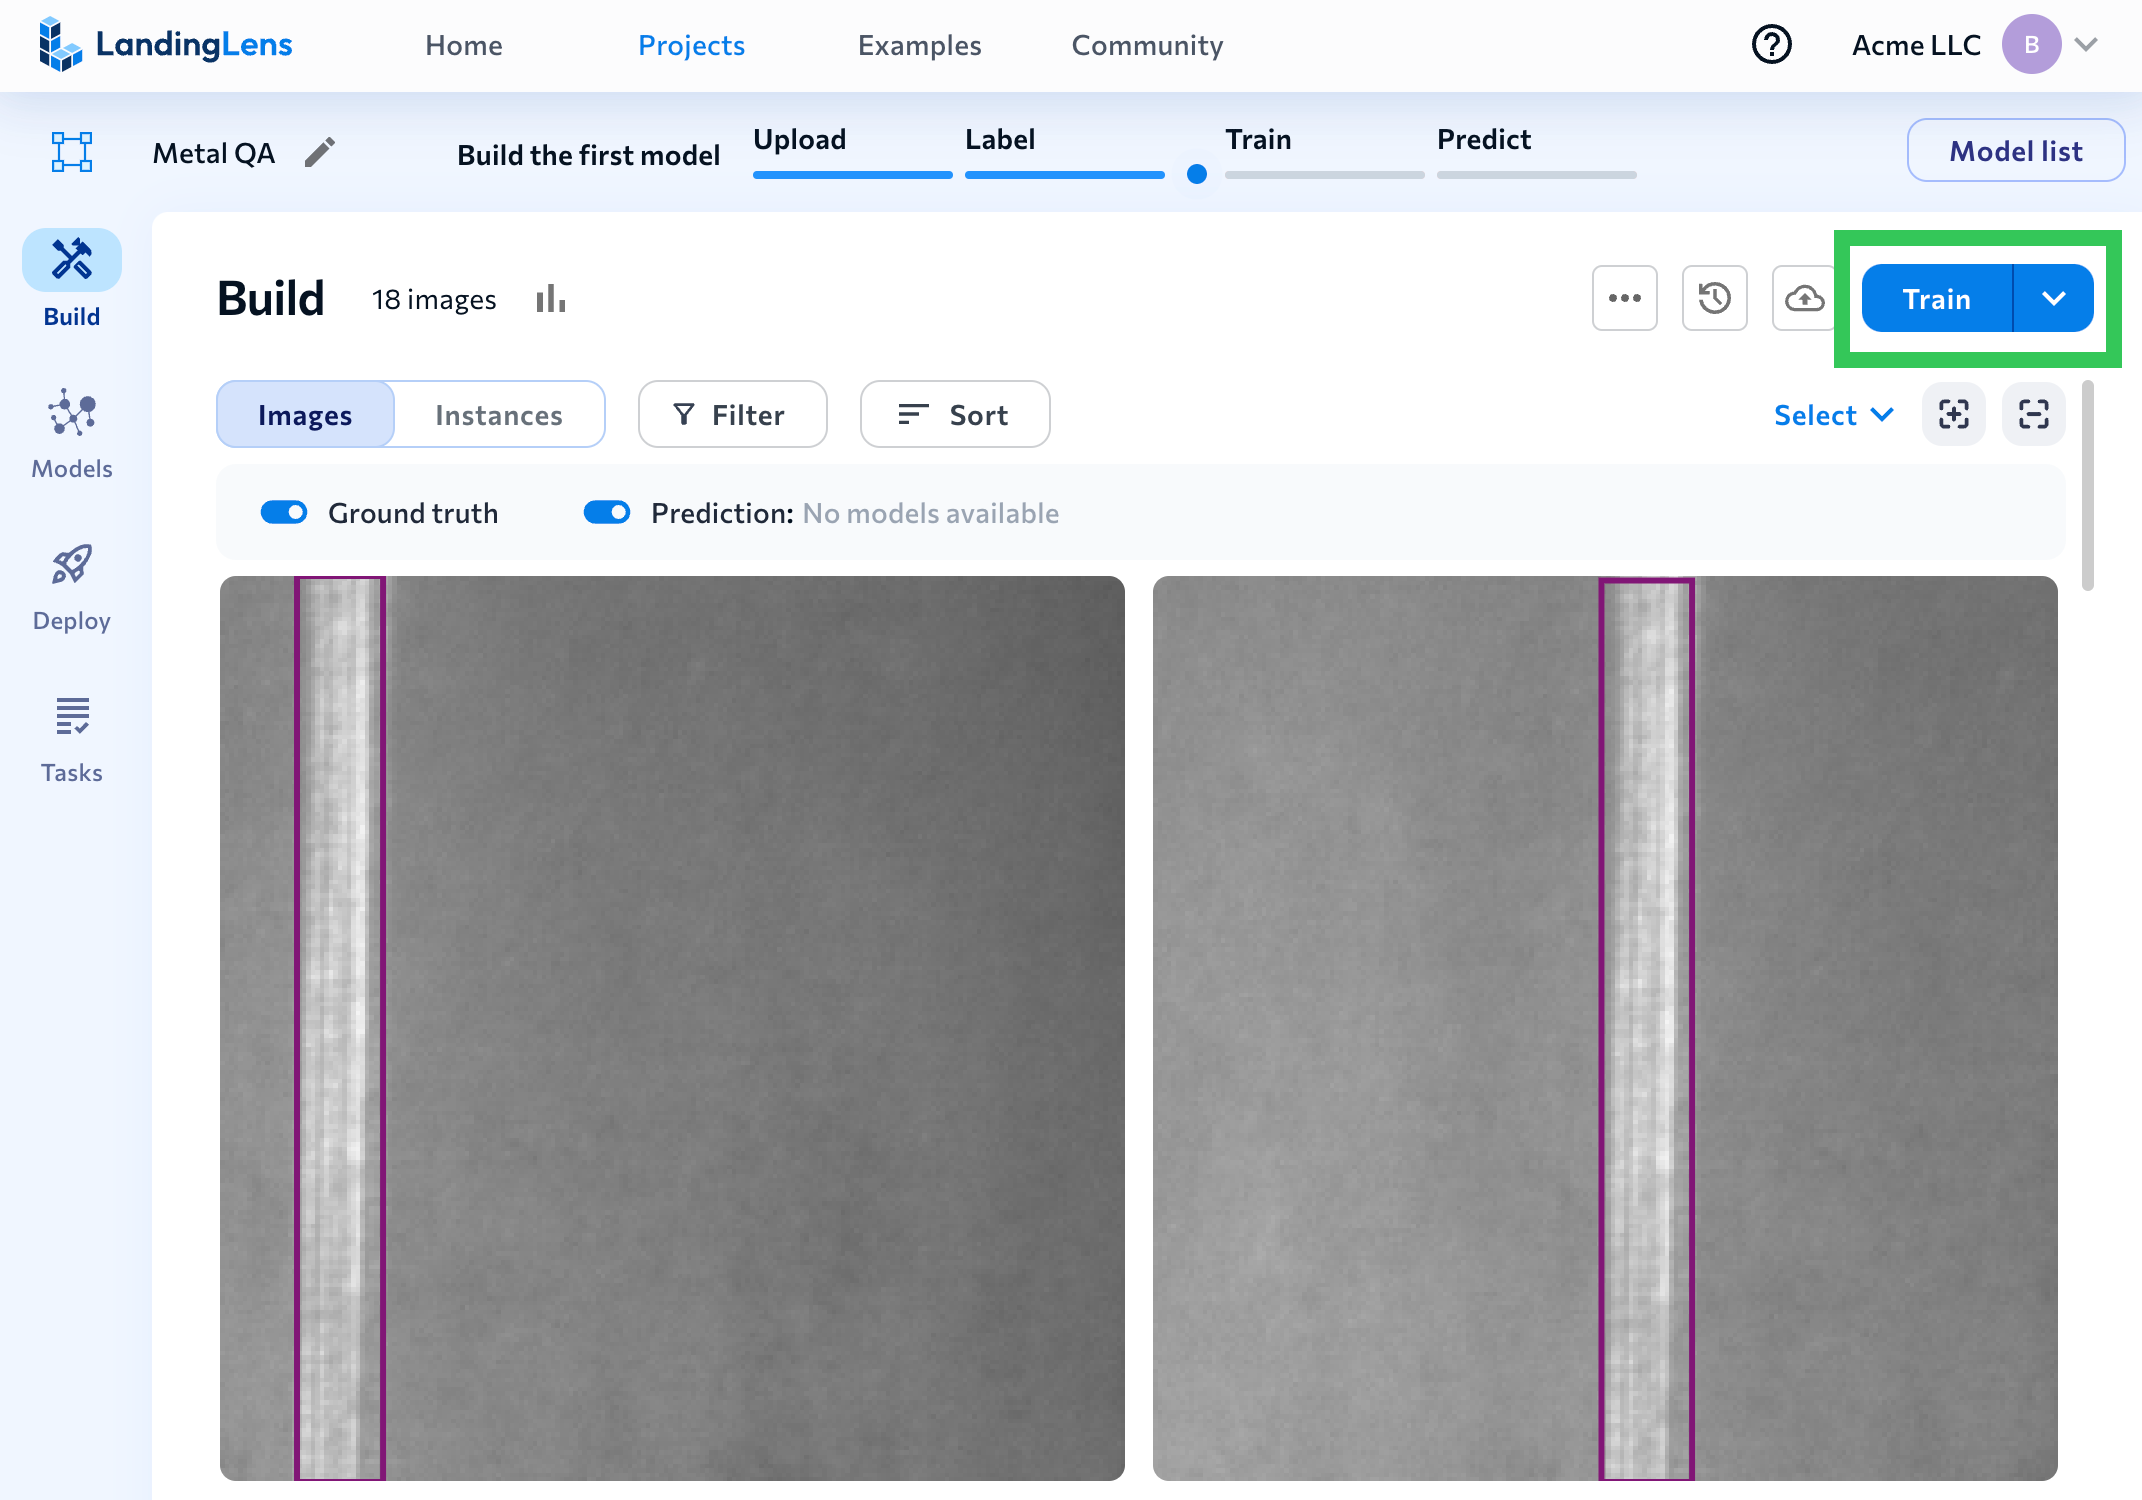 Click "Train"
 - LandingLens runs the model training processand saves the model.
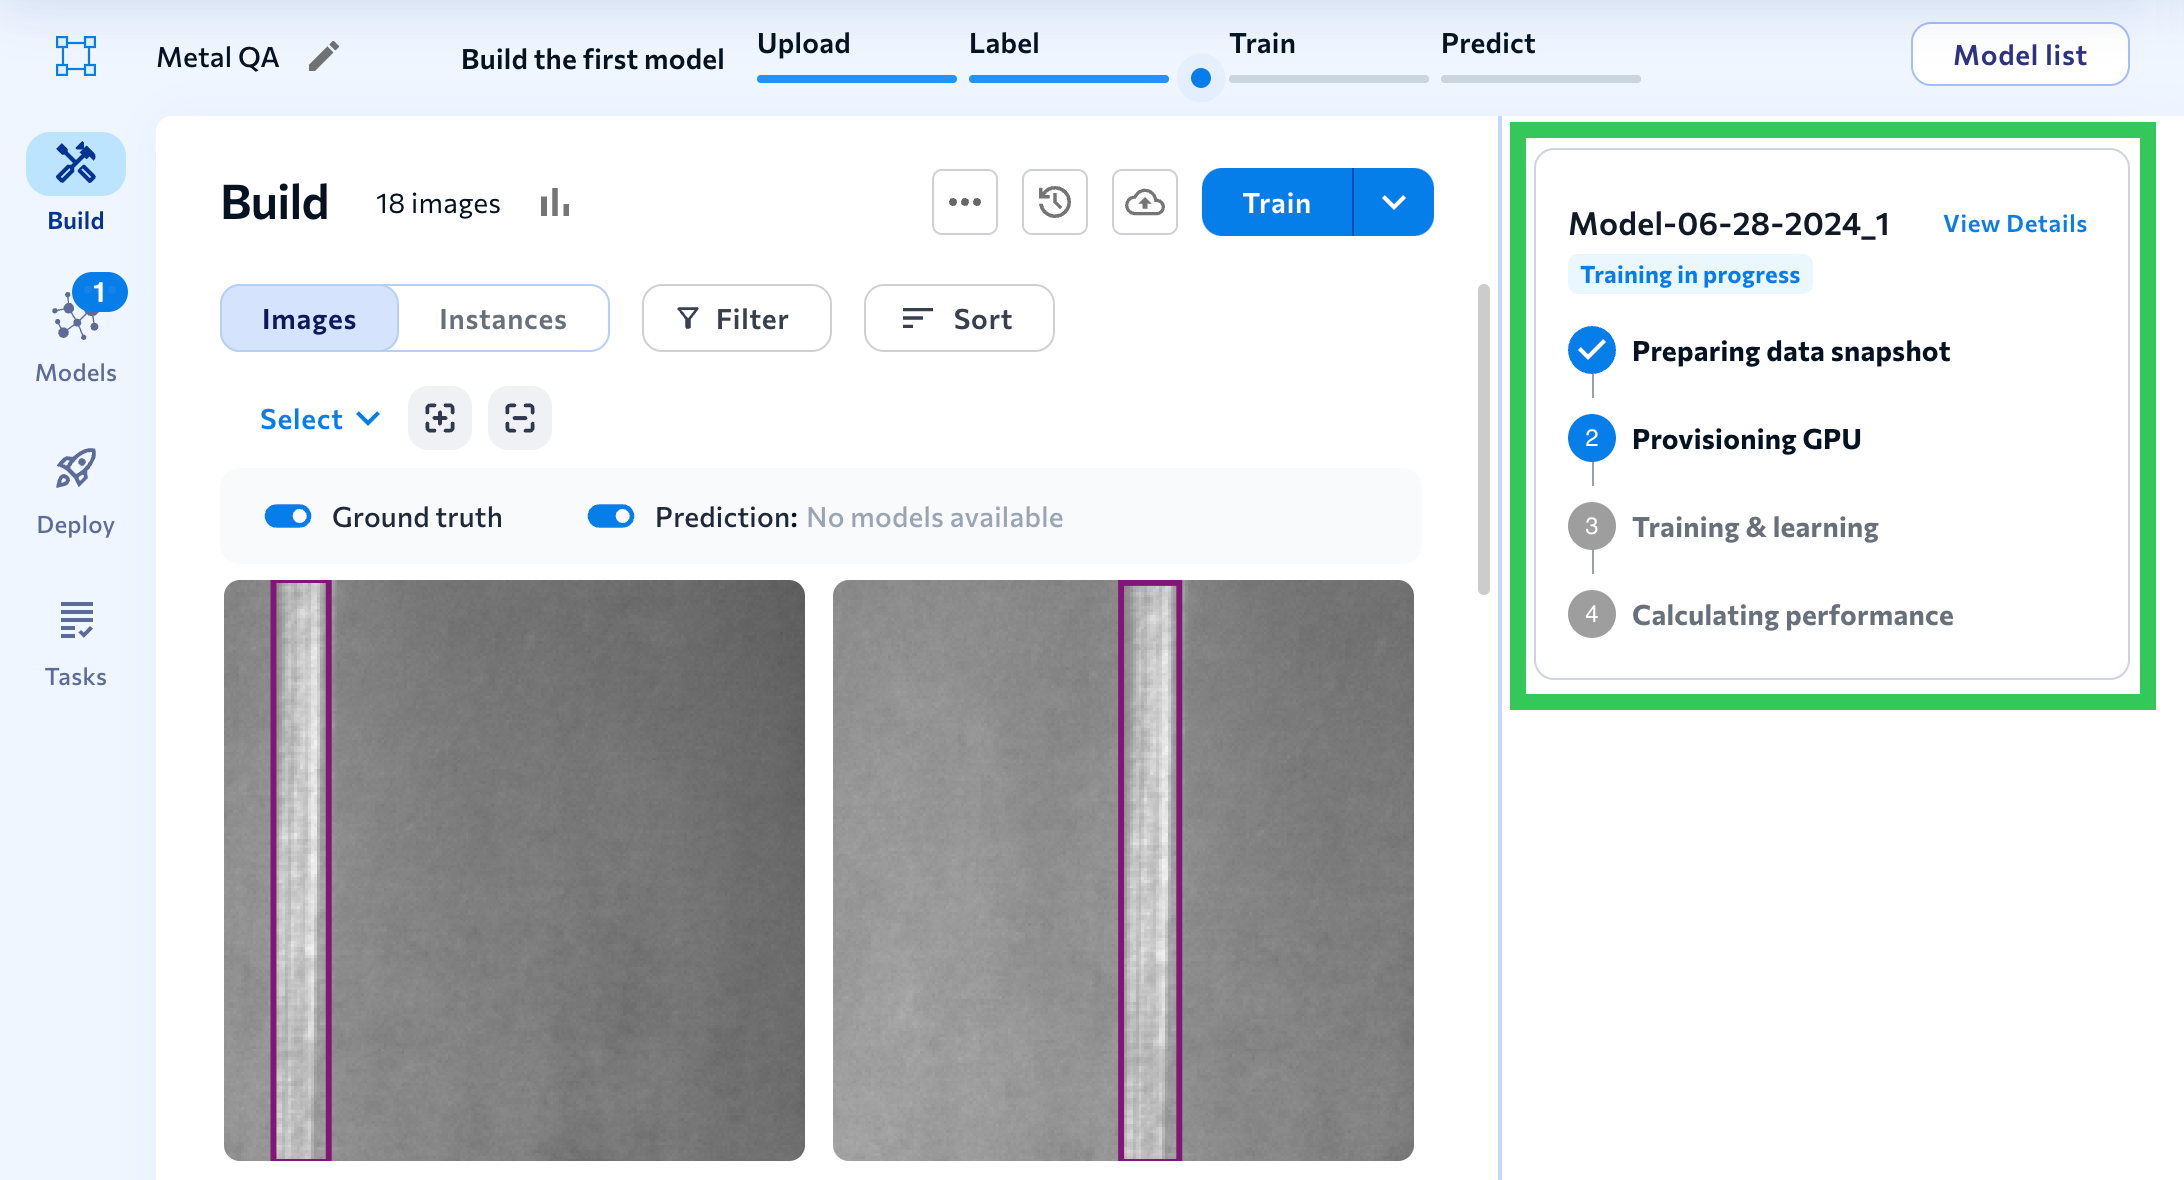 Training Process
 - After LandingLens creates the model, you can view its predictions directly on the Build tab and see detailed metrics (like its F1 or IoU scores) in the model's Performance Report.
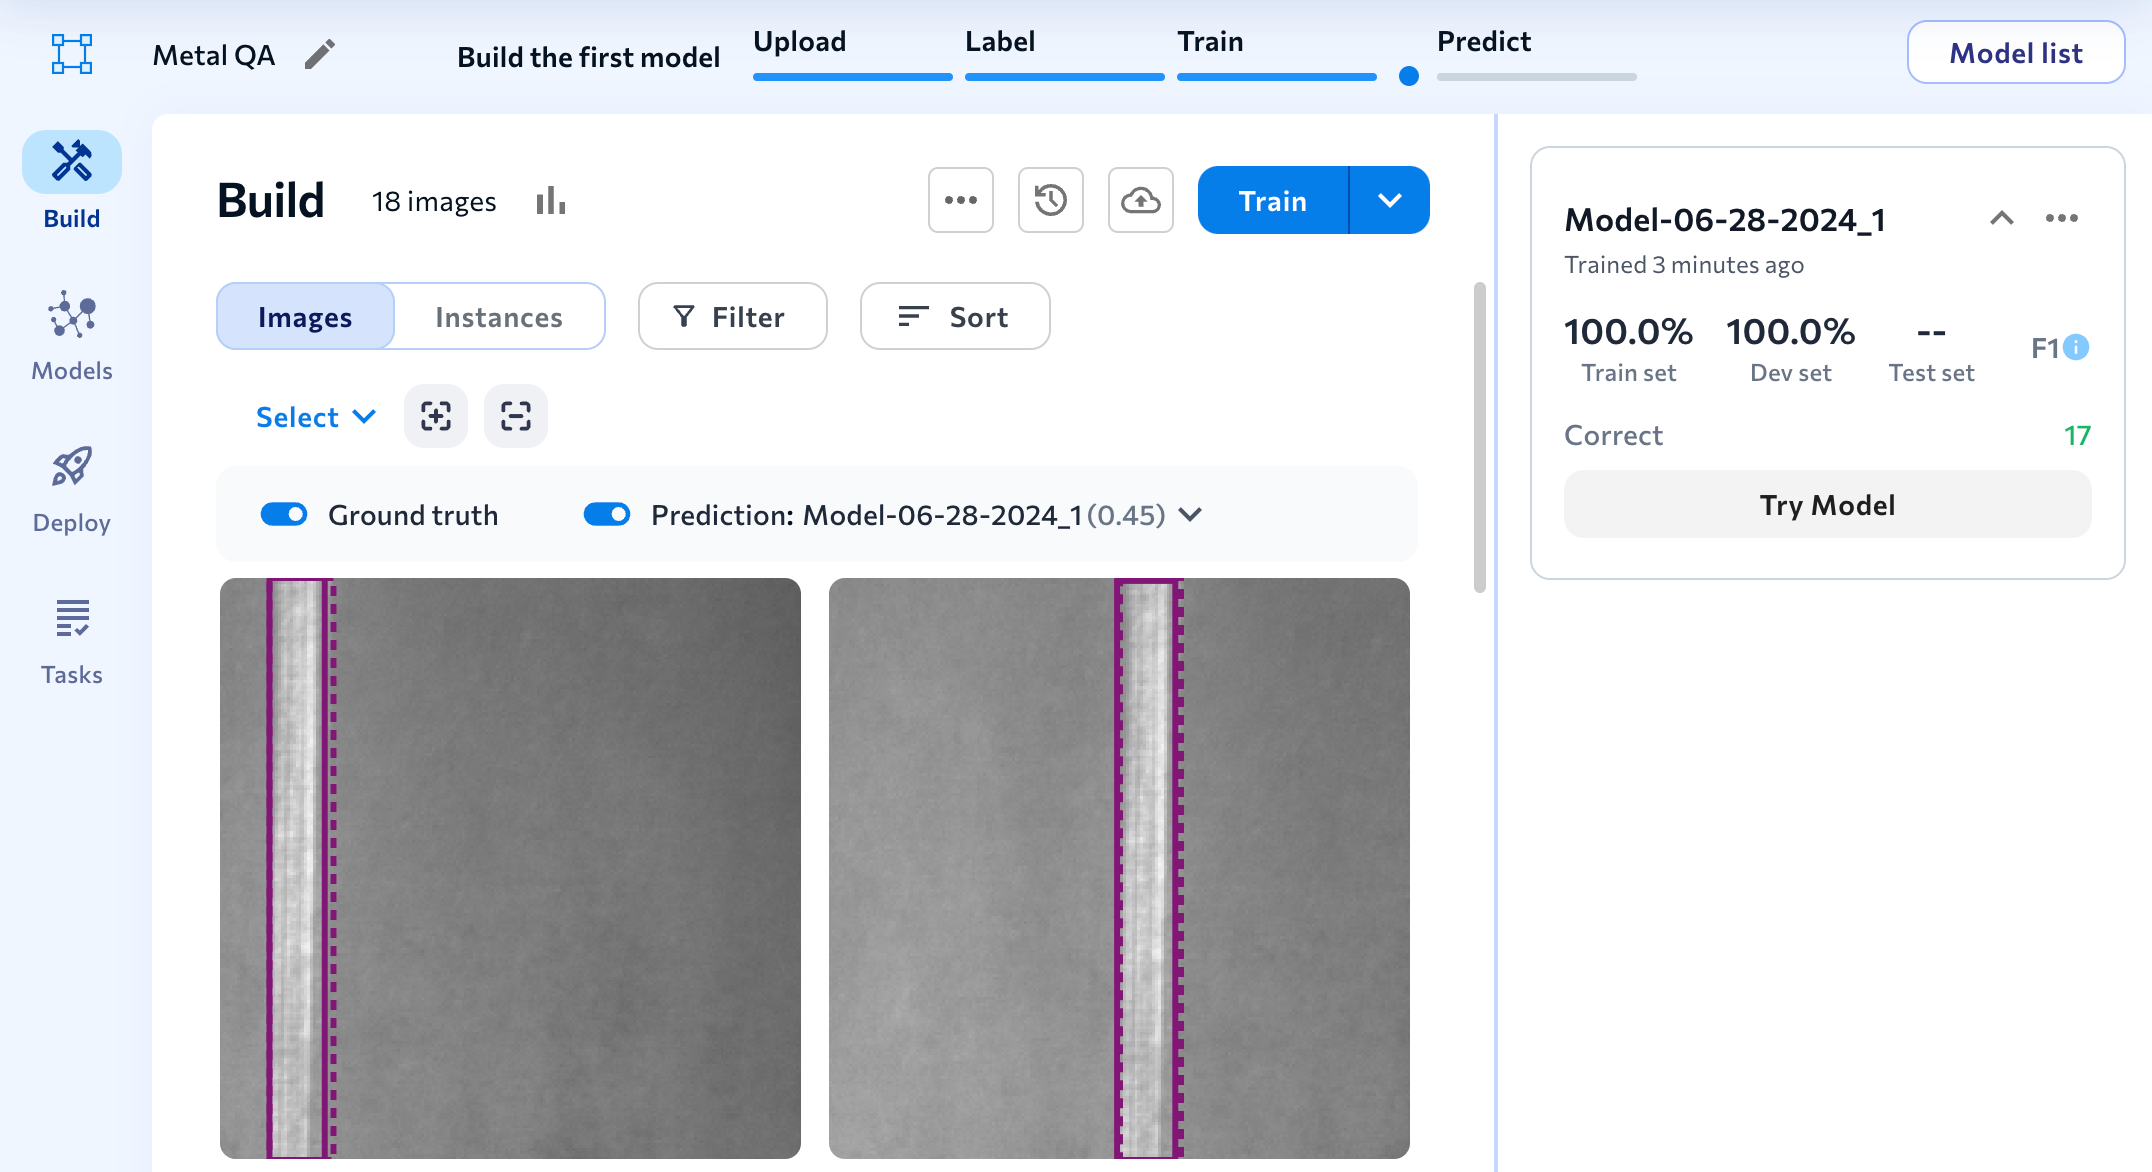 The Model's Predictions and Performance Scores Display


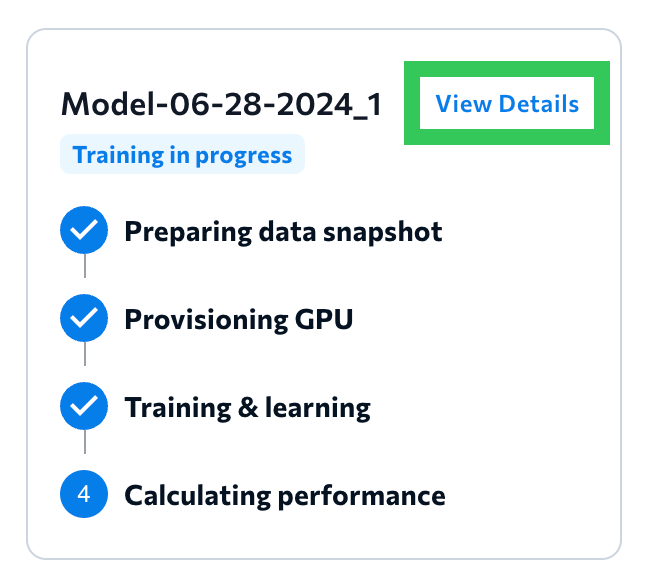
Model Training Process
 Model Training Process
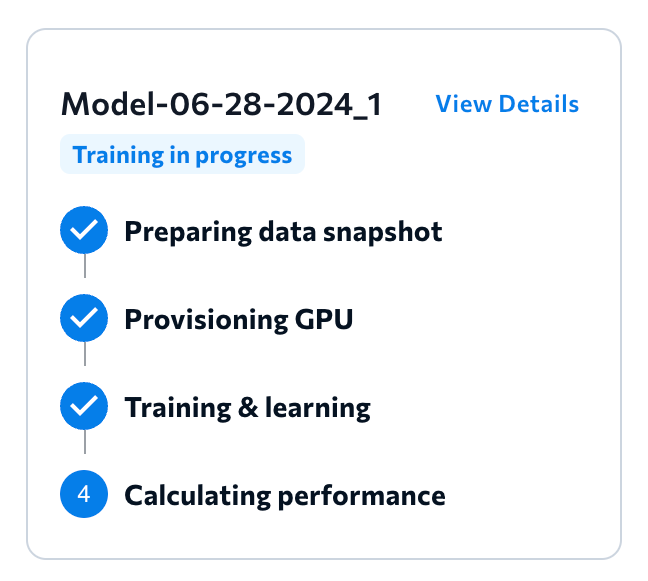
LandingLens performs the following series of steps when training a model:
- Preparing data snapshot: When the model training process begins, LandingLens saves all the images, labels, and metadata currently in your dataset. You can later access the dataset in Dataset Snapshots.
- Provisioning GPU: LandingLens warms up a virtual computer in the cloud that includes a graphics processing unit (GPU). This virtual computer is where the model training occurs.
- Training & learning: LandingLens sends the model's data and details to the virtual computer. This information tells the model how to train itself.
- Calculating performance: LandingLens calculates the metrics for the model, which show how well the model performed. To see these metrics after training, go to the model's Model Report.
View Learning Data During Model Training
During the model training process, you can view the Loss chart and training information by clicking the View Details button on the model tile.
 View Training Details
This opens a page that displays the training process, Loss chart, and training details.
The Loss chart is calculated on the Train split, which is the split that the model trains on.
During model training, LandingLens calculates the error between the ground truth and the predictions, which is called loss. This chart shows the loss over time (in seconds).
If the model improves during the training process, the line goes down toward 0 over time.
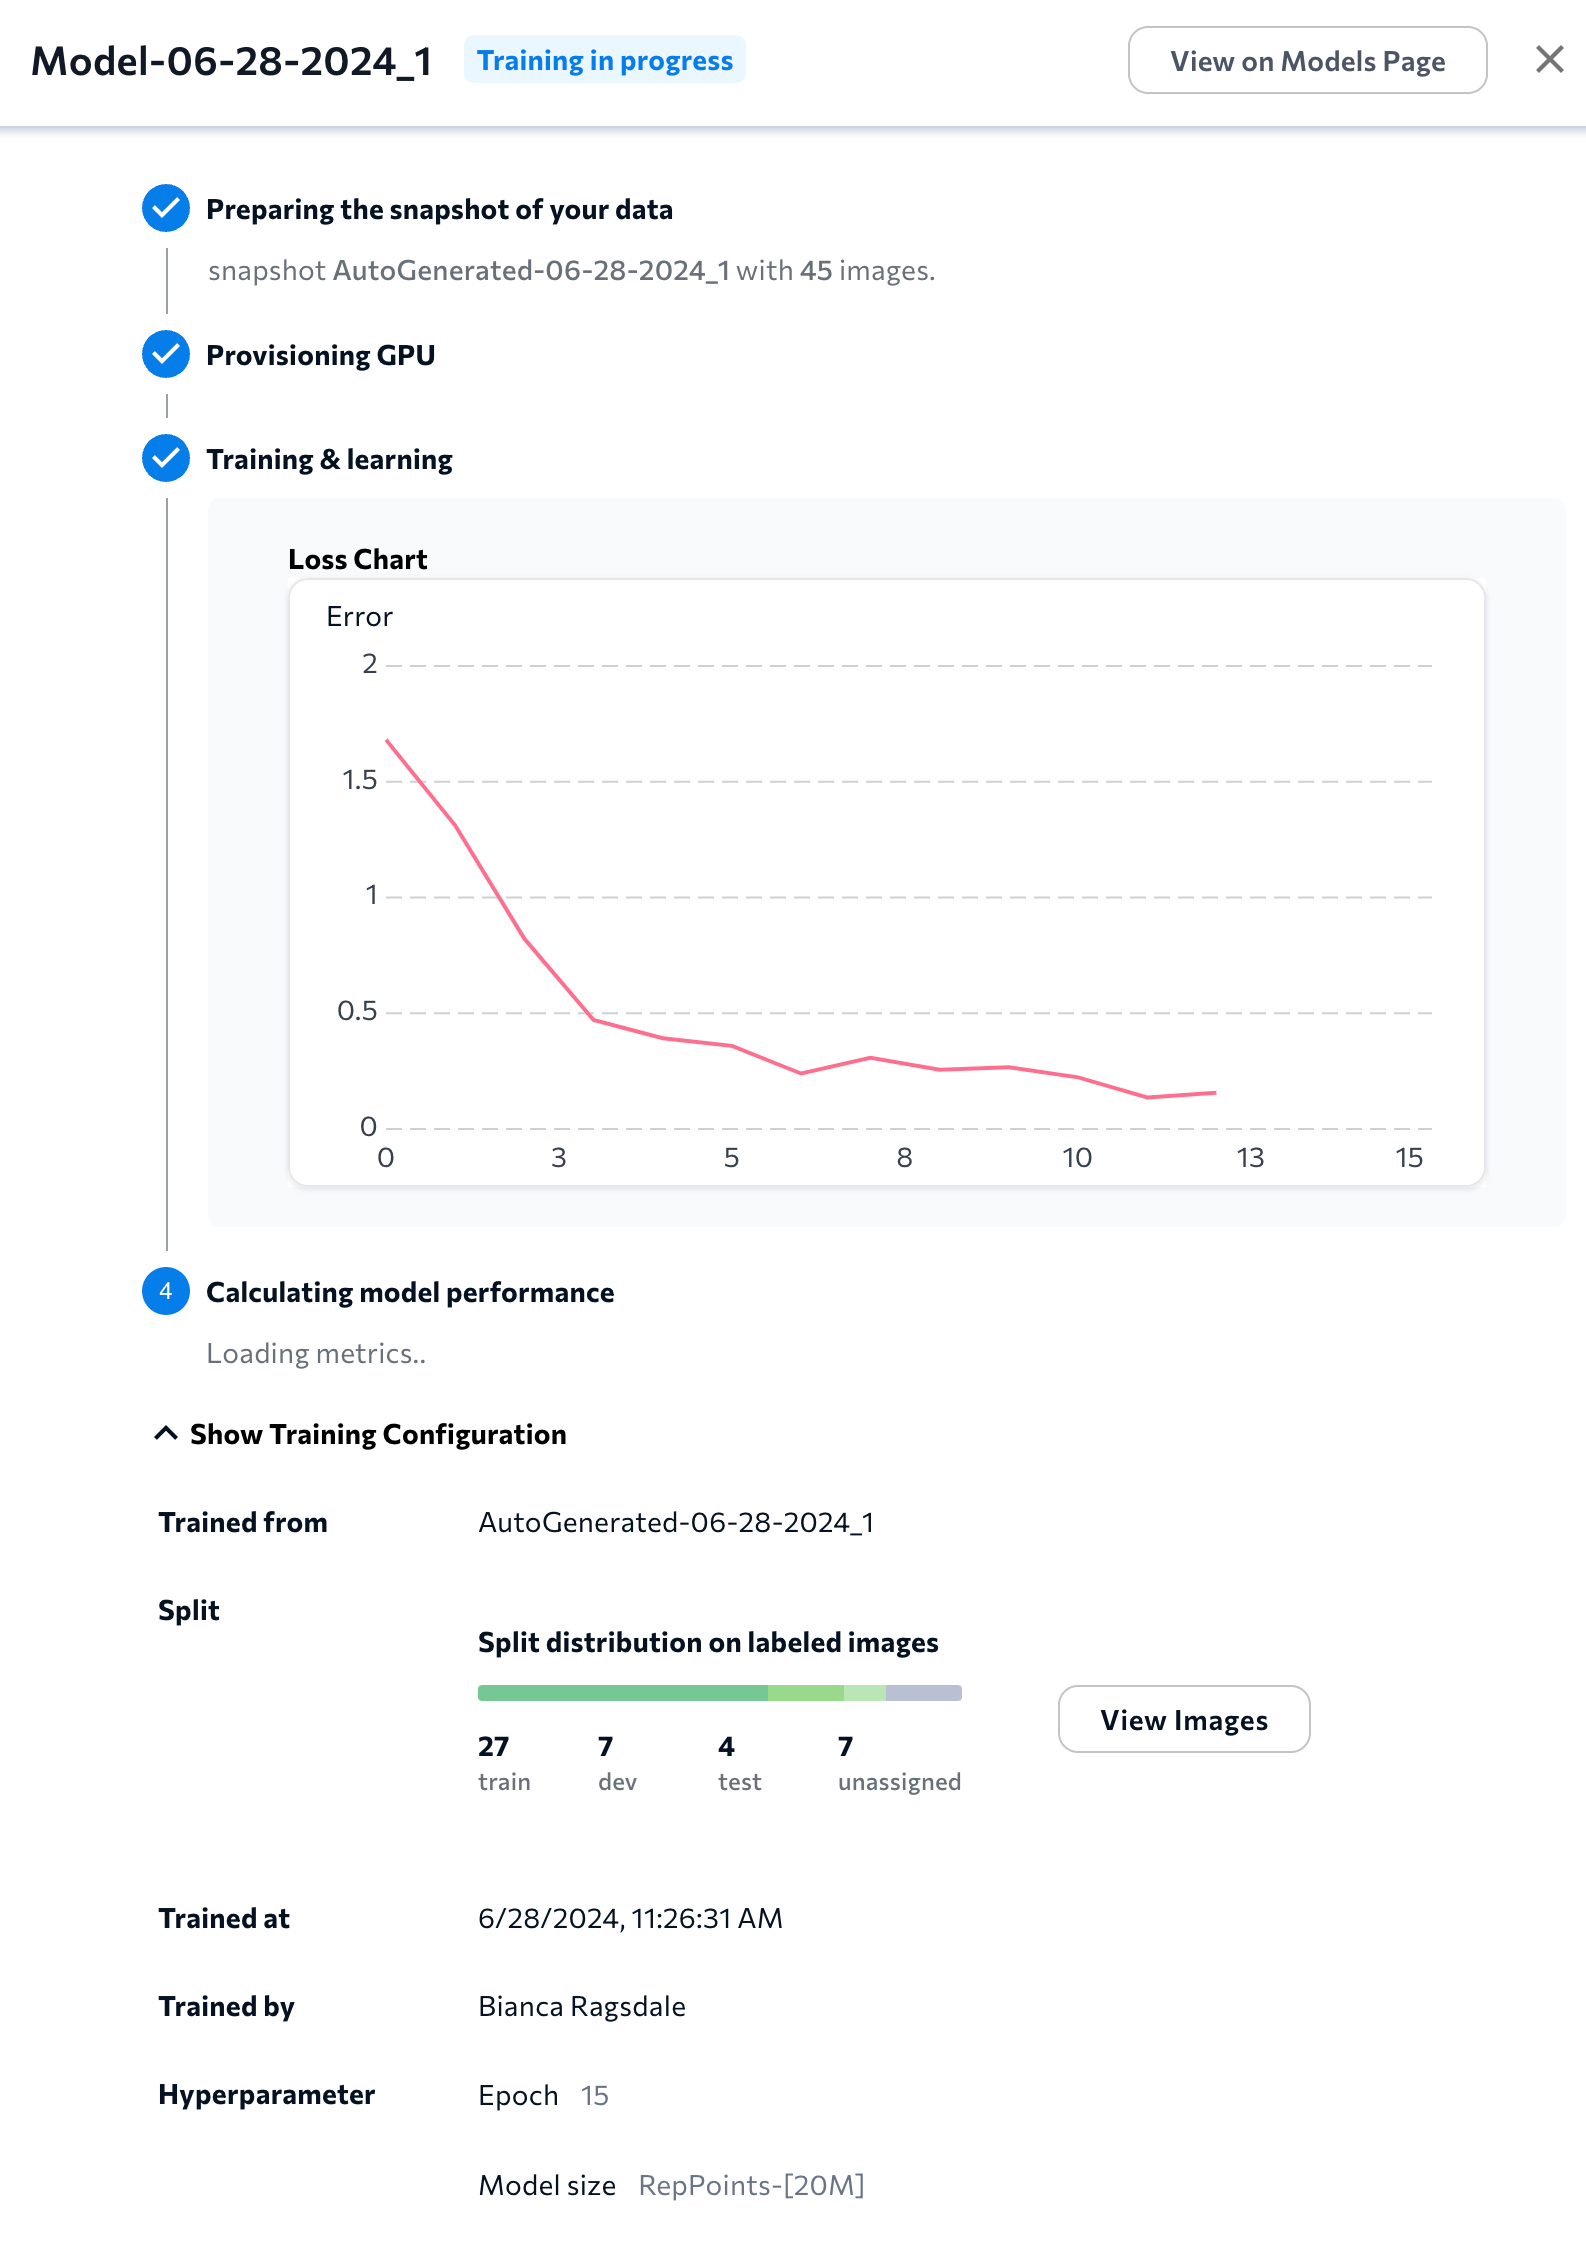 Loss Chart and Training Details
Note:
After training is complete, you can view the Loss chart and training information on the model's Training Information page.
End Training
Use End Training Now to stop model training without creating a model.
For example, if you click Train and then realize you need to annotate more images, you can click End Training Now, label those images, and then start a new training job.
If you manually end model training:
- No LandingLens credits will be consumed (not applicable if using LandingLens on Snowflake.)
- LandingLens will not generate a model, even if it started cycling through the dataset. This prevents users from accidentally using incomplete models.
- A dataset snapshot will still be automatically generated.
To end model training:
- Click the End Training Now button on the model tile.
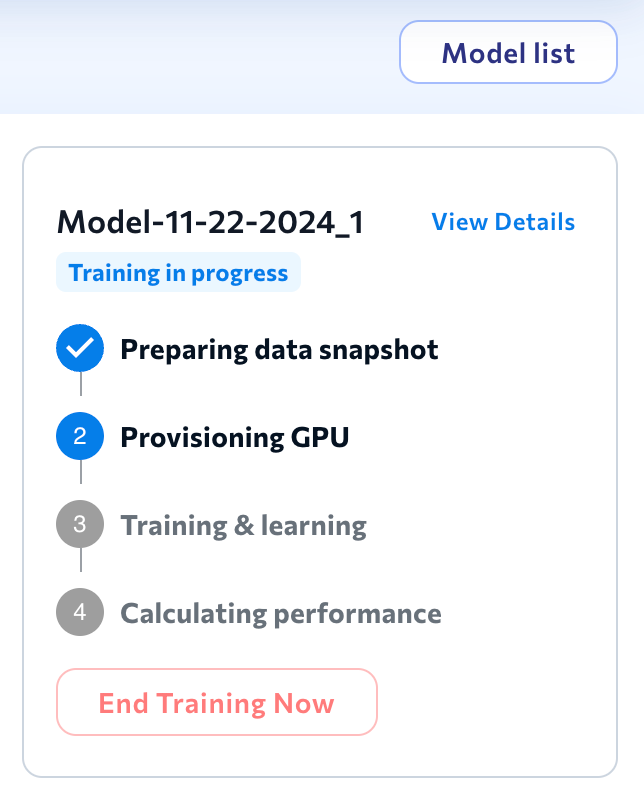 End Training Now
 - A confirmation pop-up appears. Click End Training to confirm.
- The model tile has the message Manually Ended.
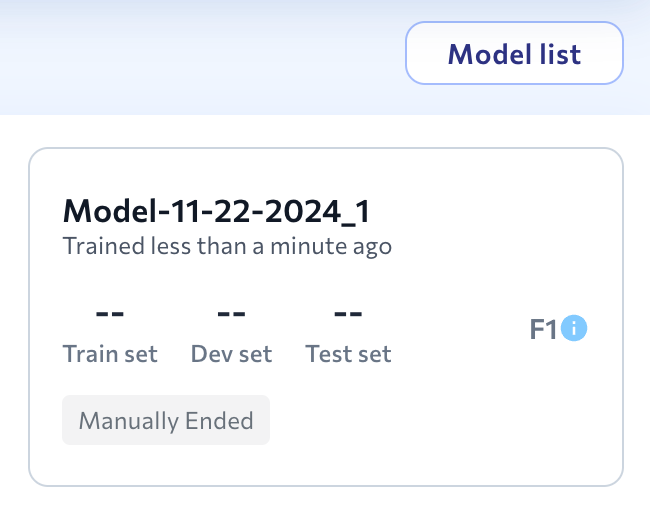 Manually Ended


Train Multiple Models at Once
Note:
Parallel training is not available in LandingLens on Snowflake. For more information, go here.
When one model is training, you can start training another model. This is helpful if you want to compare performance between multiple datasets or model training settings. Training multiple models at once is sometimes called "parallel training".
Parallel training is available for both the Fast Training and Custom Training methods. Up to 10 models can be trained at a time.
Let’s say you want to build two models for the same dataset using Custom Training. You want one model to use 30 epochs and the other to use 40 epochs. You can start training the second model without waiting for the first one to complete. This capability empowers you to run experiments faster.
To see the status of a model, open the Model list. Models that are still training have the status Training in progress.
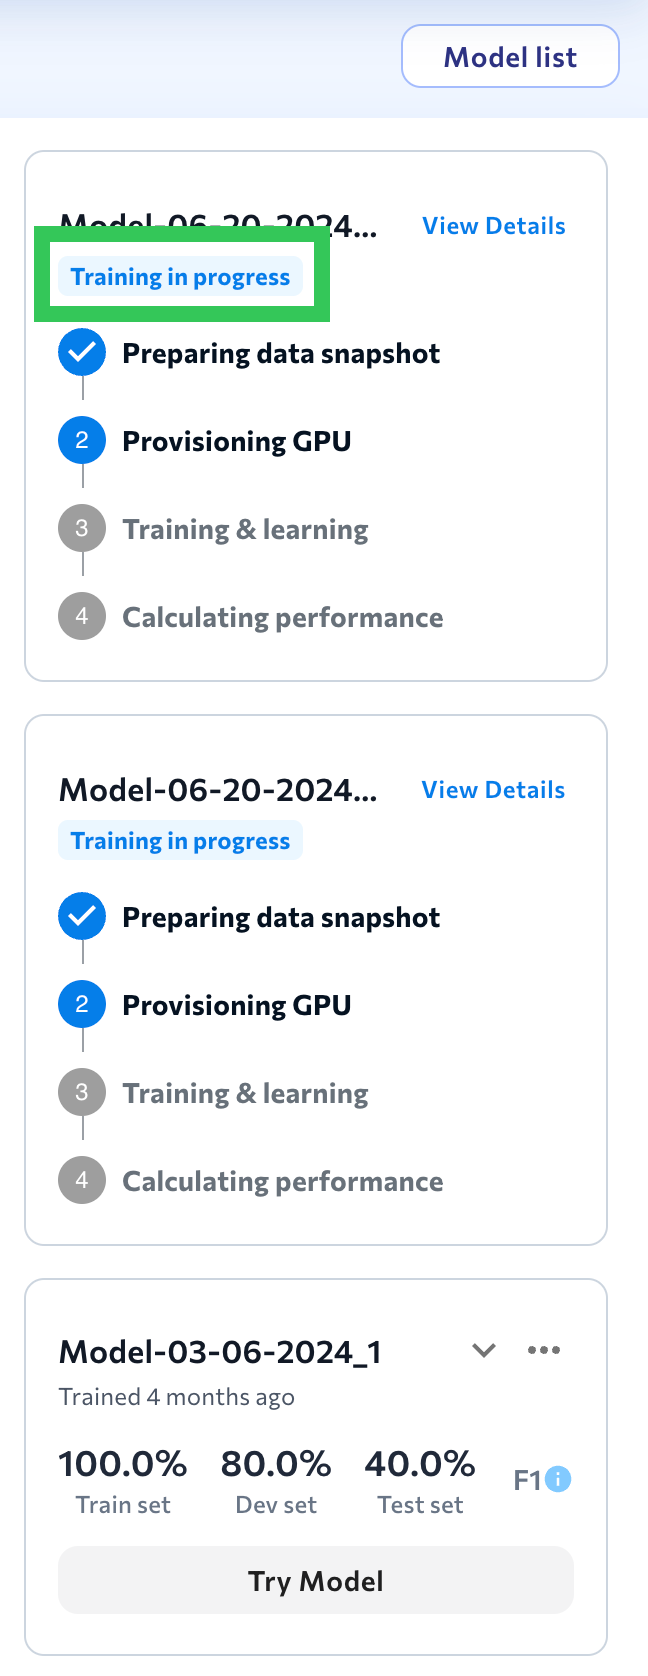 See Which Models Are Still Being Trained
LandingLens on Snowflake: Training Jobs Are Sequential
The LandingLens on Snowflake app uses one GPU, so it can only train one model at a time. You can start multiple training jobs at the same time, and LandingLens will process them sequentially, and not in parallel.
To help you understand where a training job is in the queue, hover over the timer in the Provisioning GPU step during model training. A tooltip displays this information:
- The estimated time it takes to activate (spin up) the GPU.
- How many training jobs are ahead of the current training job in the queue. This count includes training jobs from all projects and all users in your instance of LandingLens on Snowflake.
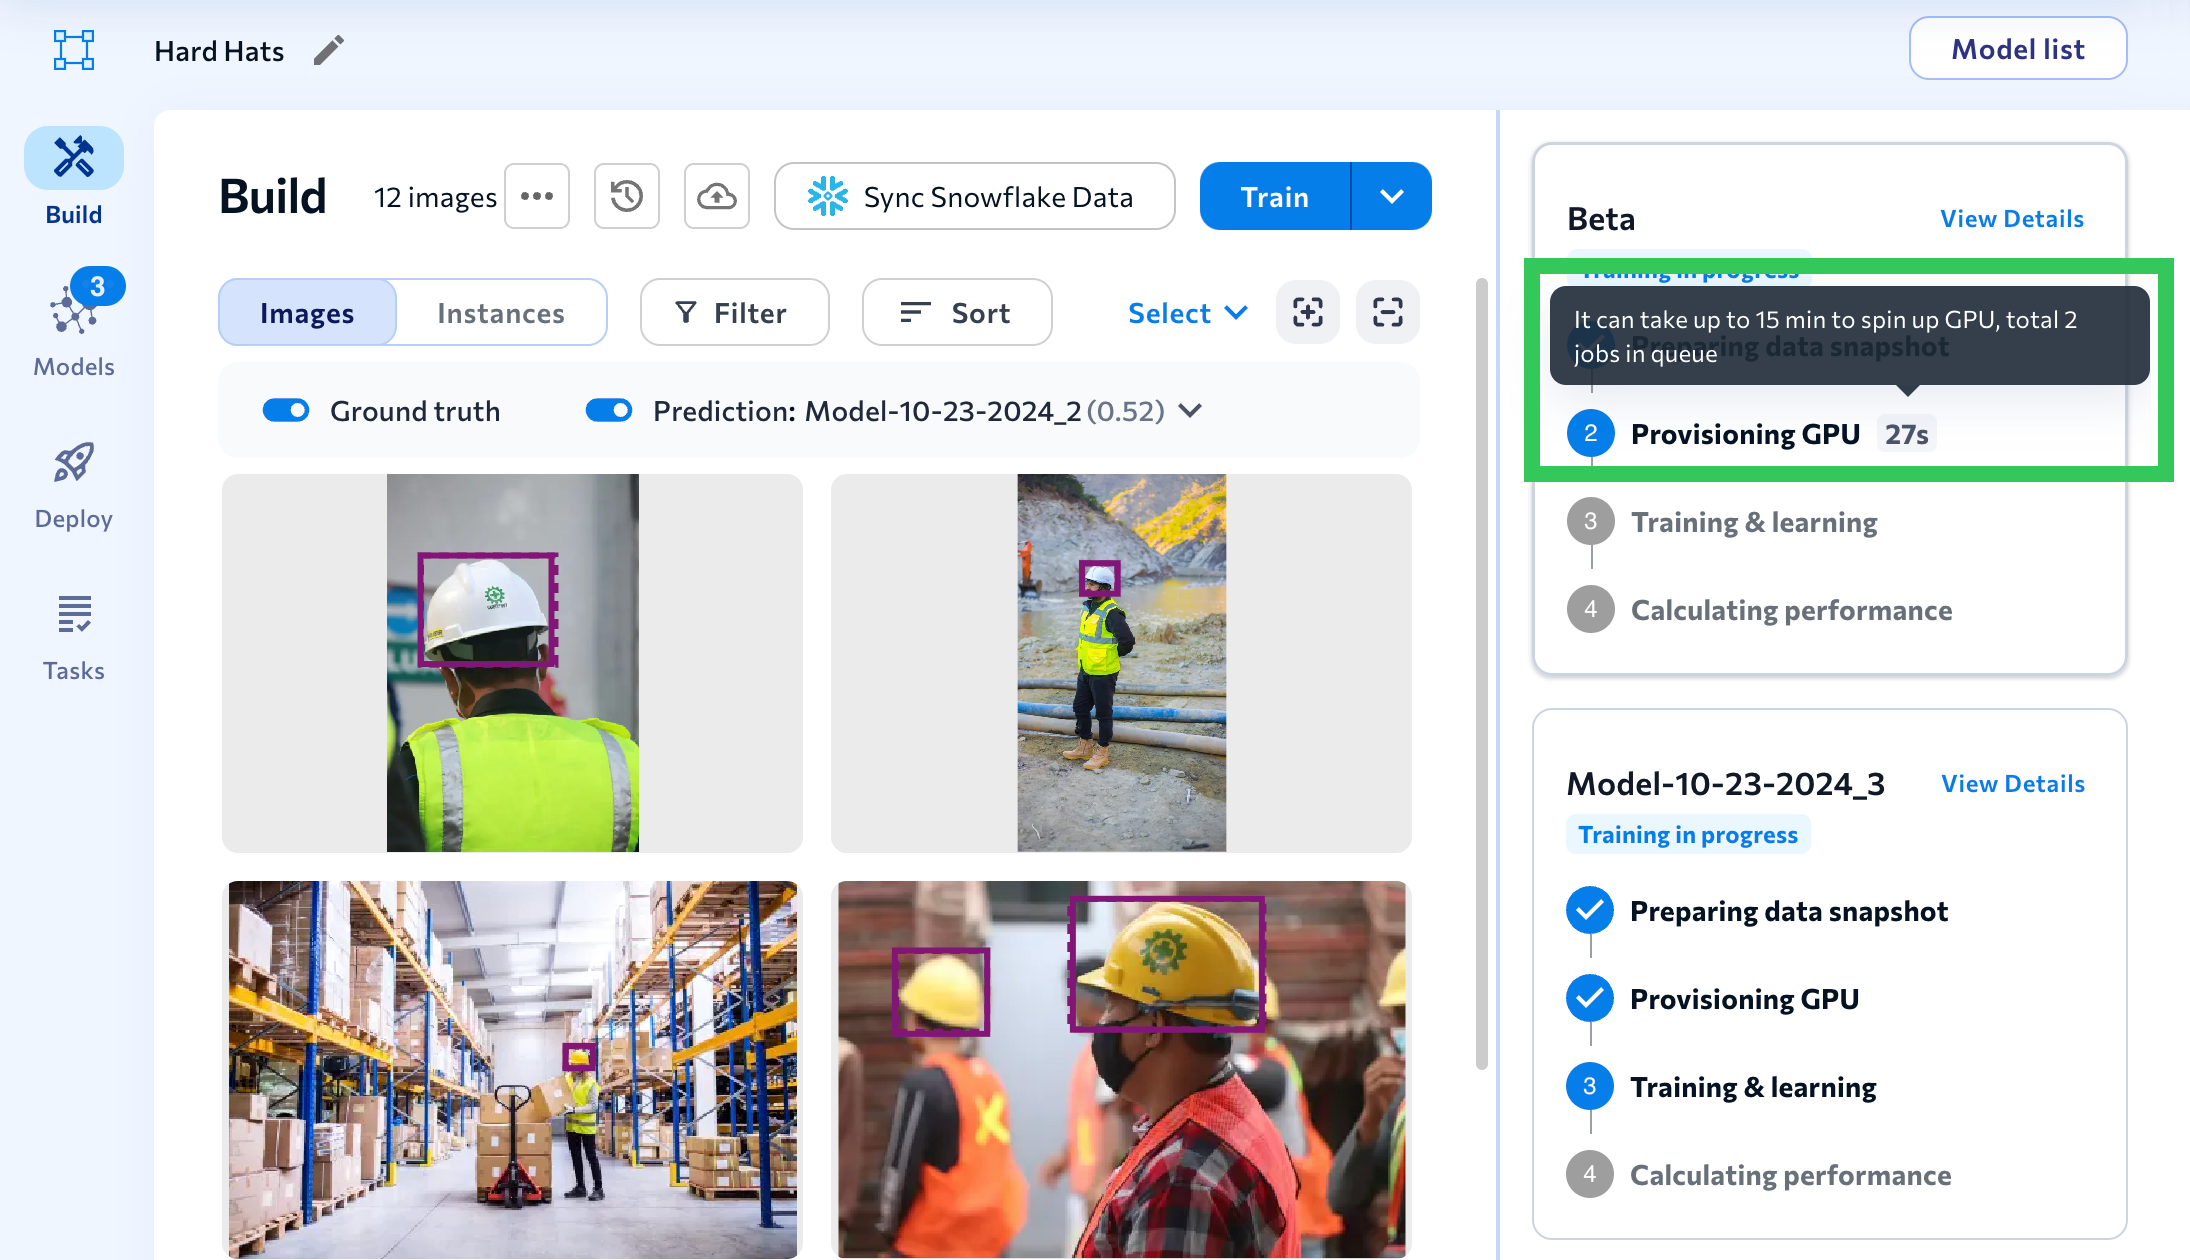 Training Job Queue
Was this article helpful?