Historical Data
- 21 Dec 2022
- 2 Minutes to read
- Print
- DarkLight
- PDF
Historical Data
- Updated on 21 Dec 2022
- 2 Minutes to read
- Print
- DarkLight
- PDF
Article summary
Did you find this summary helpful?
Thank you for your feedback
Historical Data
LandingLens automatically saves Predicted Images to the Historical Data tab on the Deploy page. This is useful if you want to refer back to your Predicted Images later and reuse them to retrain your model.
 The Historical Data Tab Displays Predicted Images
 Save Predicted Images to Your Project
You can save Predicted Images to your Model so that you can retrain that Model with those Images. For example, let's say that you have a Model trained to detect hardware in cereal, but the Model did not detect a screw in some Predicted Images. You can save these Predicted Images to your Model, label them, then retrain your Model.
To save Predicted Images to your Model:
- Go to the Deploy page.
- Click the Historical Date tab.
- Select the images you want to save to your Model.
- Click Add to Data Browser. The image will have the status In Sync.
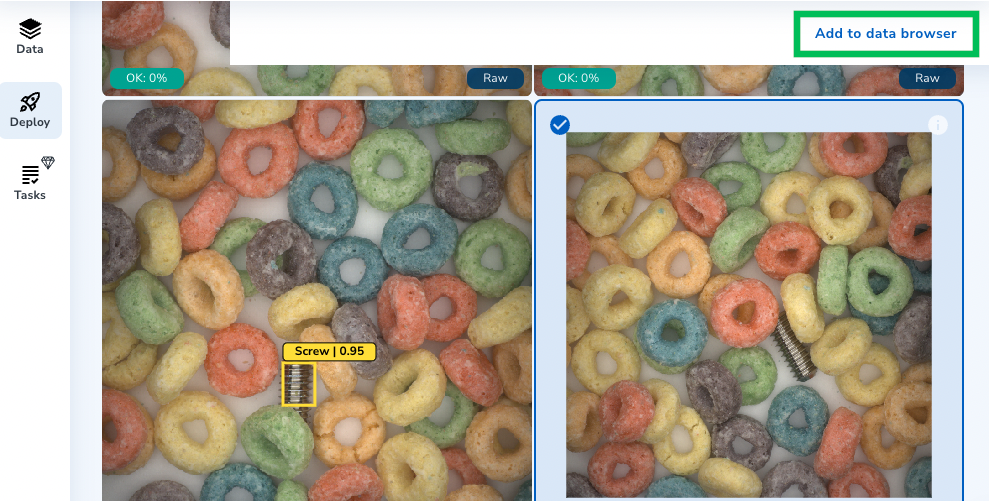 Add to Data Browser

Image Statuses
Images on the Historical Data tab can display two statuses: Raw and In Sync.
- Raw means that the image is the original that was uploaded to the Project.
- In Sync means that the image was sent to the Data Browser.

 "Raw" and "In Sync" Statuses
Image Detail Settings
When you hover over an image in the Historical Data tab, the i icon displays. Click this icon to view the image details.
.png) Click the "i" Icon to View the Image Details
Click the "i" Icon to View the Image Details
 Image Details
The table below describes the sections on the Image Details pop-up window.
| # | Section | Description |
|---|---|---|
| 1 | Toggle Full-Screen / Exit Full-Screen | Enters and exits the full-screen mode. |
| 2 | Image Enhancement | Manually adjust the brightness and contrast. Or choose an option to add enhancements automatically. These options are useful if an image is too dark and you want to brighten it so you can better see the details of the image, for example. |
| 3 | Show Labels | Toggle on and off the labels on the image. This is useful if you want to search the image for any missed items, for example. |
| 4 | Directional Keys | Navigate to the next or previous image. |
| 5 | Hotkeys | View a list of all the available hotkeys (keyboard shortcuts). |
| 6 | Close Window | Close the Image Details pop-up window. |
| 7 | Confidence Score | If the Model detected items in an image, the Confidence Score displays. The Confidence Score represents how confident the Model is that its Prediction is correct. For example, in the screenshot above, the model is 19% (0.19) and 17% (0.17) confident that the items detected are screws. |
| 8 | Information | If you used an API to upload metadata, that metadata will display in this section. The Media ID is generated internally in the database. |
| 9 | Human Judgment | Data populates in this section after you or someone else marks a Prediction as "Correct" or "Incorrect."
|
| 10 | Download | Download the original image. This image will not show any Predictions. |
| 11 | Correct/Incorrect | Allows users to mark Predictions as "Correct" or "Incorrect." |
Was this article helpful?