Manage Label Books
- 20 Dec 2022
- 1 Minute to read
- Print
- DarkLight
- PDF
Manage Label Books
- Updated on 20 Dec 2022
- 1 Minute to read
- Print
- DarkLight
- PDF
Article summary
Did you find this summary helpful?
Thank you for your feedback
Overview
Images need to be labeled consistently.To help Labelers understand how to label images, it is best practice to create a Label Book. A Label Book is a living document that allows you to define how to label various categories of Classes clearly.
Classes Must Be Descriptive
To help Labelers understand how to label images, it is best practice to be as descriptive as possible in the Label Book. The following points are a few examples of information that you can include in your Classes description:
- What does the object to be identified look like?
- What parts of the object should be labeled?
- How do you label objects that overlap?
- If you're labeling with bounding boxes, how close should you keep the box to the object?
Let's take a look at the example of washers below.
 Washers
 Since Labelers will be looking at two types of washers, it's important to describe each type thoroughly. For instance:
- (Left) Circular hardware with 8 grooves on the inner circle. Keep the bounding box as close as possible to the object without touching it.
- (Right) Circular hardware with 6 grooves on the inner circle.Keep the bounding box as close as possible to the object without touching it.
Add Descriptions and Images to Classes
It's important to add descriptions and images to Classes. This information will be a reference point to ensure that all users label data similarly.
To add descriptions and images to Classes:
- Open the Project you want to edit.
- Click the Actions button (horizontal ellipses) and select Classes.
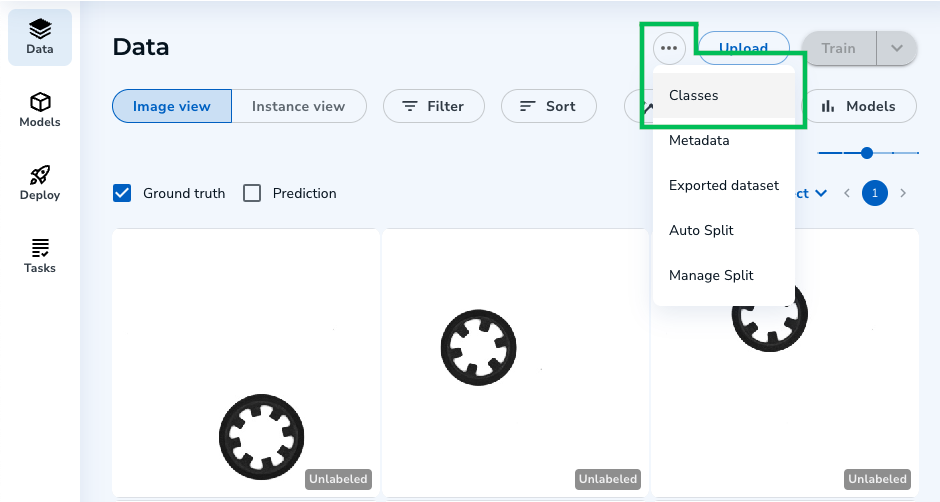 "Classes" Option
 - Click Edit next to the Class you want to update.
.png) Edit
Edit - Enter a thorough description of the Class in the field provided.
- Click Add Media to upload an example of the Class you are describing. For example, upload an image of this washer type if you are editing a description for a six-tooth washer.
.png) Add a Description and Image
Add a Description and Image - You can update images as needed by hovering over the image and selecting the appropriate icon.
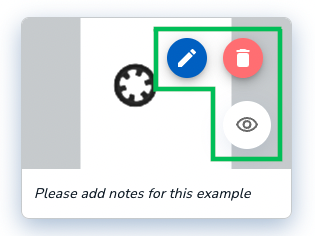 Icons Display on Hover
- Delete: Delete the image.
- Edit: You can add a label (like a bounding box) to the image. Then you can add a description of how to label objects.
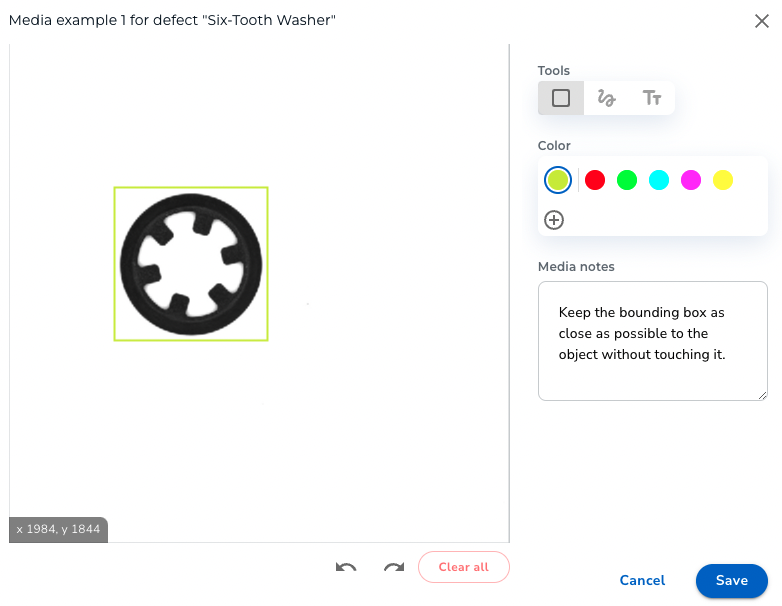 Edit Uploaded Images
 - Hide: If you've added labels to the image using the "Edit" feature, you can hide them by hovering over the "Hide" icon.
 Hide Labels Created from the "Edit" Tool
- Delete: Delete the image.
- Click Save.

.png)
.png)


Was this article helpful?